
Welcome to the Step-by-step Shopify Integration Guide
If you have already created a single item, please start from step 2. If not, please start from the beginning.
-----------------------------------------------------------------------------------------------
Overview
Step 1: Create a single item on the Scanatic™ for Fashion website
Step 2: Download and install the “Metafields guru” app
Step 3: Generate integration code
Step 4: Add custom codes to your “theme” (You will only need to do this for the first time)
Step 5: Add Products and Configure Variants
Step 6: Copy and paste the customization options and style combinations
Step 7: Add the UUID to “Metafields guru”
Step 8: Check the results on your store
-----------------------------------------------------------------------------------------------
Step 1: Create a single item on the Scanatic™ for Fashion website
Log into the Scanatic™ for Fashion website and navigate to the “Apparel” tab (you must be subscribed to the Stylebook Services to see this tab) on the left.
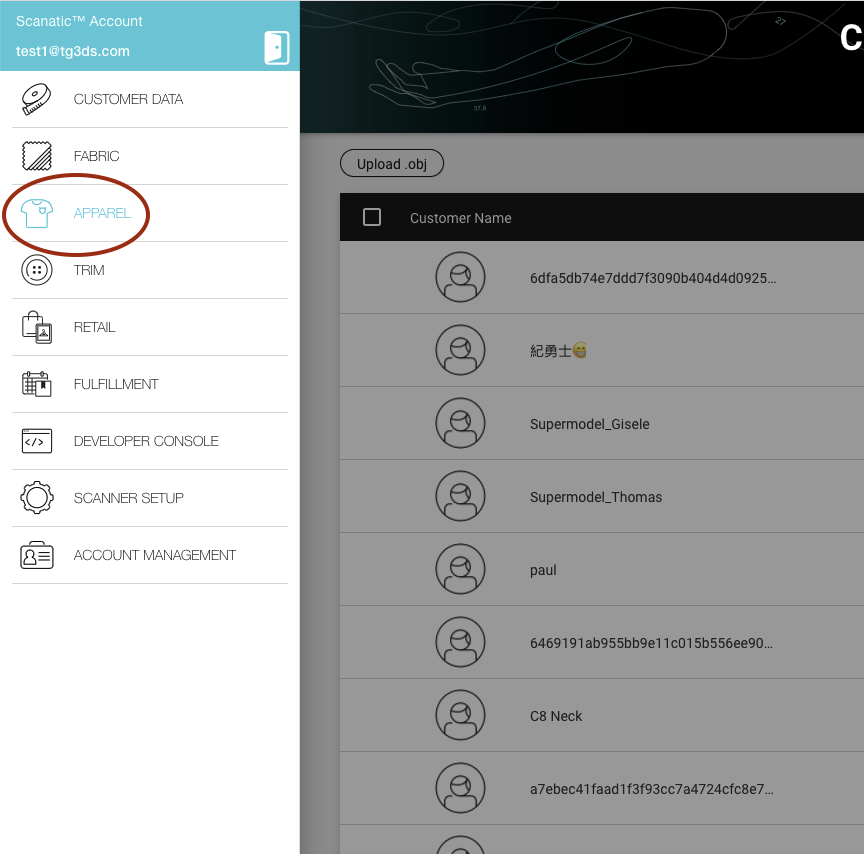
Choose a design project that you would like to be used for customization and create a single item from it.
*Note: if you haven’t added any fabrics to the design project before, please click “Edit Design Project” to add fabrics before creating a single item. Click here to learn how to add fabrics to your design project.
Step 2: Download and install the “Metafields guru” app
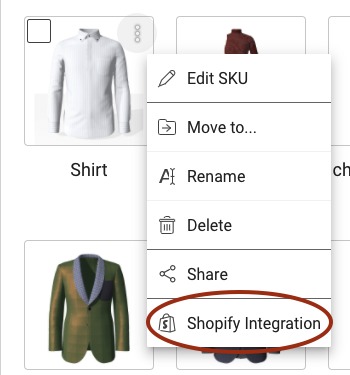
Navigate to the “Single item” tab and find the single item that you've created in step 1.

Click the dots icon on the upper right-hand side of the single item and click the “Shopify Integration” tab
It will open a “Shopify Integration” page on the Scanatic™ for Fashion website. Please download the “Metafields guru” app and install it in your shop by clicking the “Download” button.

After clicking the “Download” button, it will open a new page in the “Shopify app store”. Please click the “Add app” button under the title “Metafields guru”. Follow the on-screen instruction to finish the installation process.
*Note: Please leave this “Shopify Integration” page open. We will go back to the page later.

Please make sure that you have already downloaded the “Metafields guru” app and installed it onto your Shopify account before proceeding to the following steps.
Step 3: Generate integration code
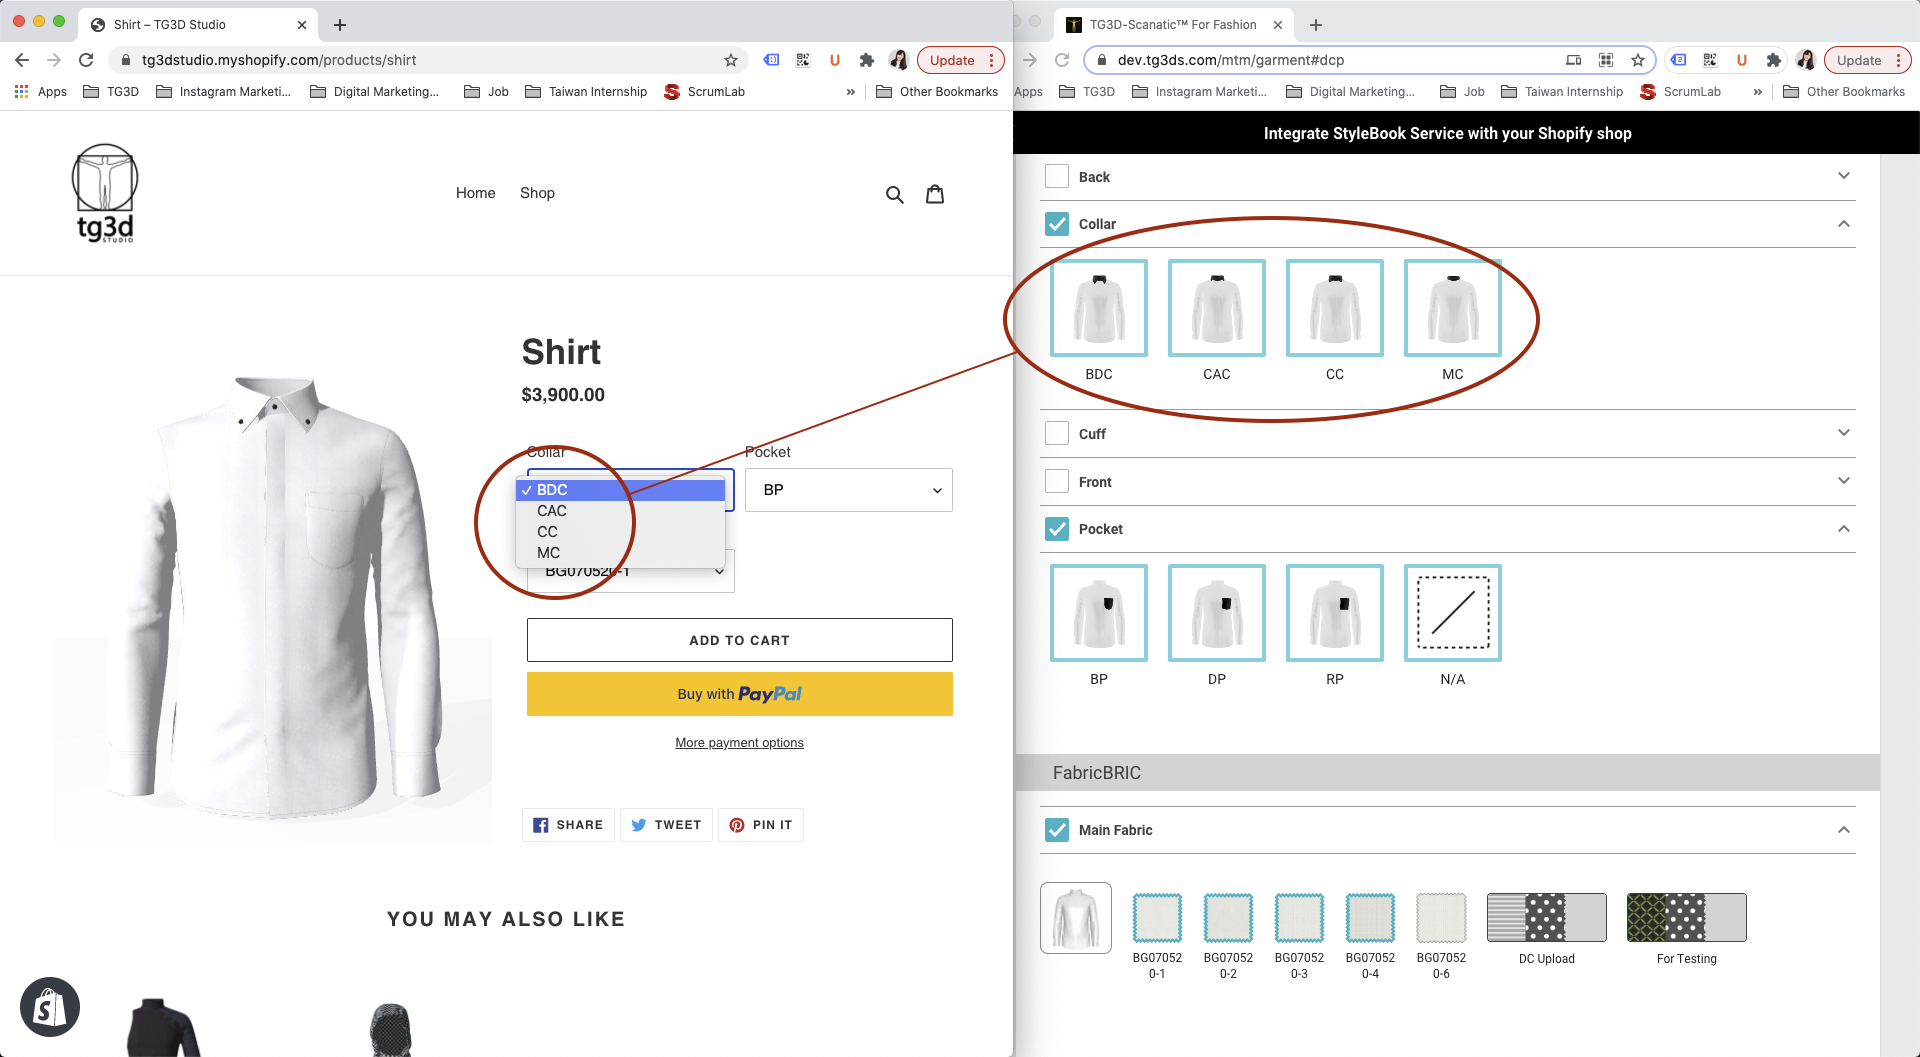
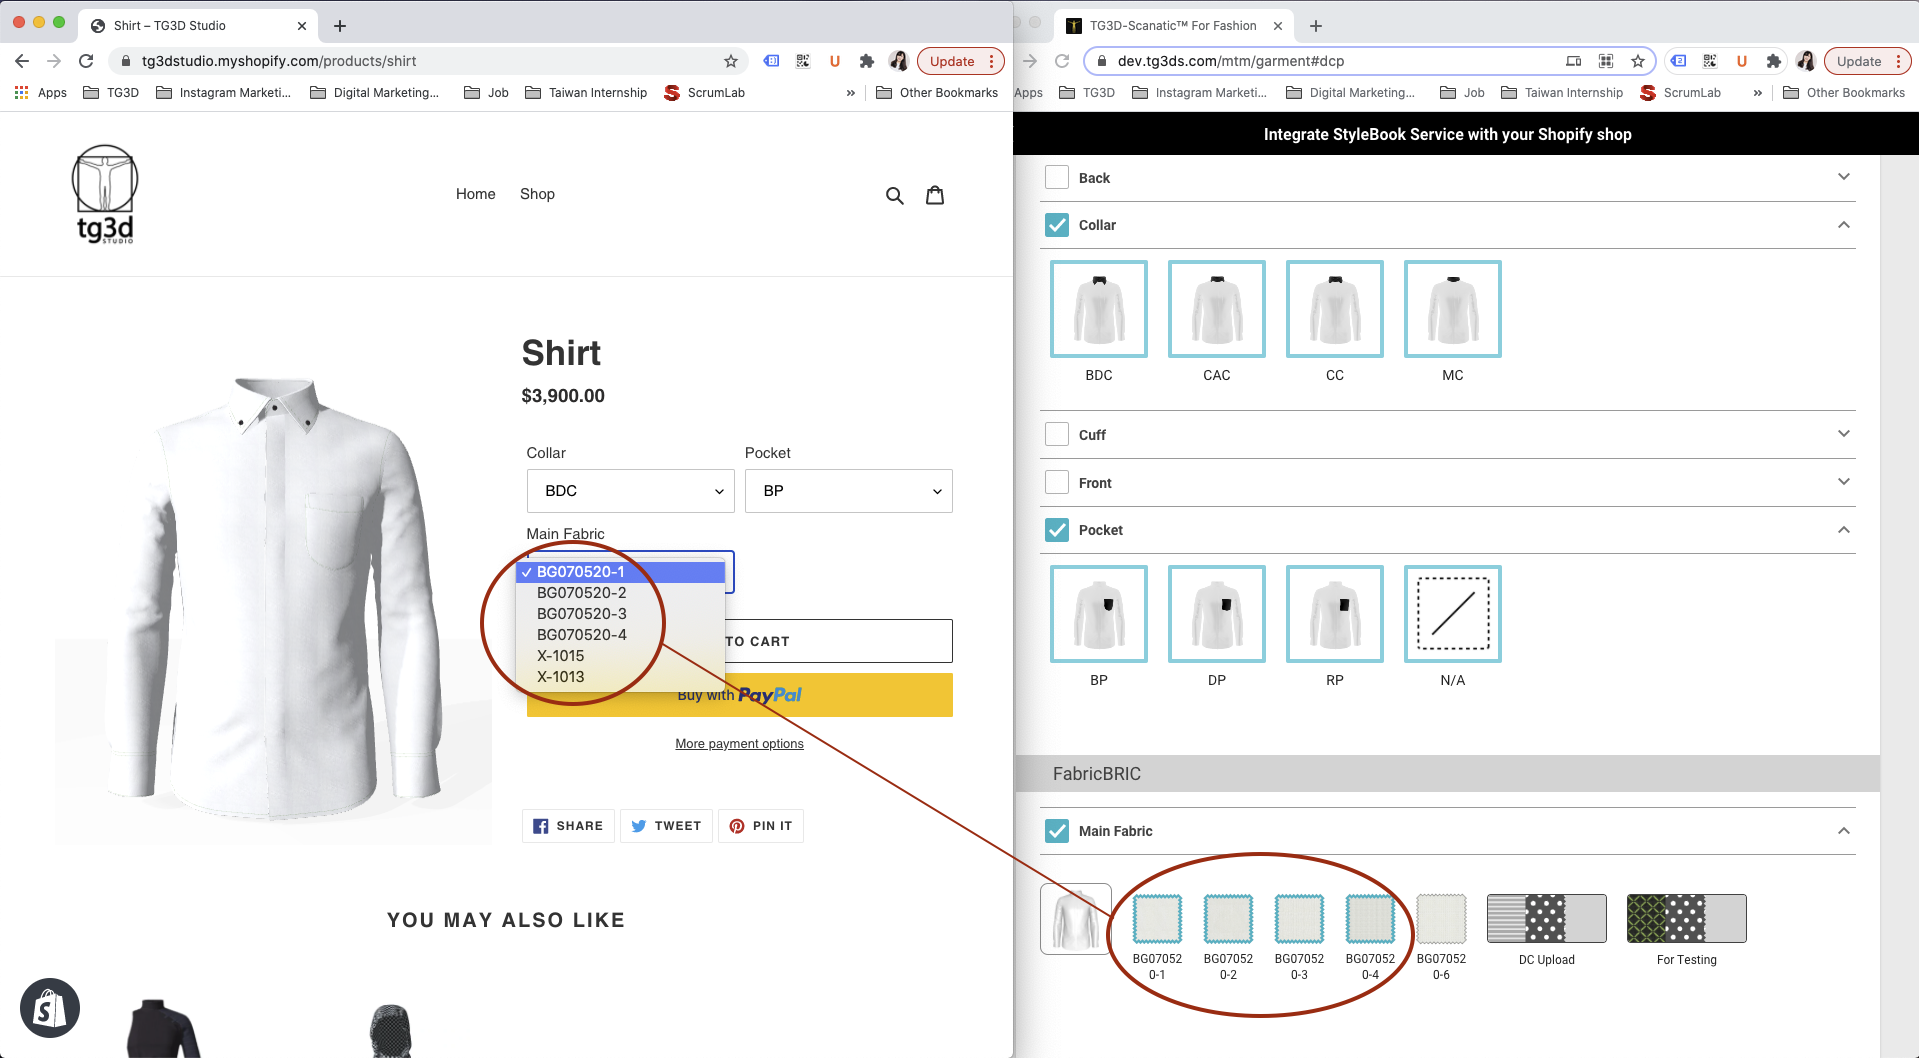
Go back to the “Shopify Integration” page on Scanatic™ for Fashion website, choose your style/customization options that you want to make available on your Shopify shop. You will see some wordings and codes automatically generated at number 3. and 4.
*Note: Please leave the “Shopify Integration” page open. We will go back to the page later.
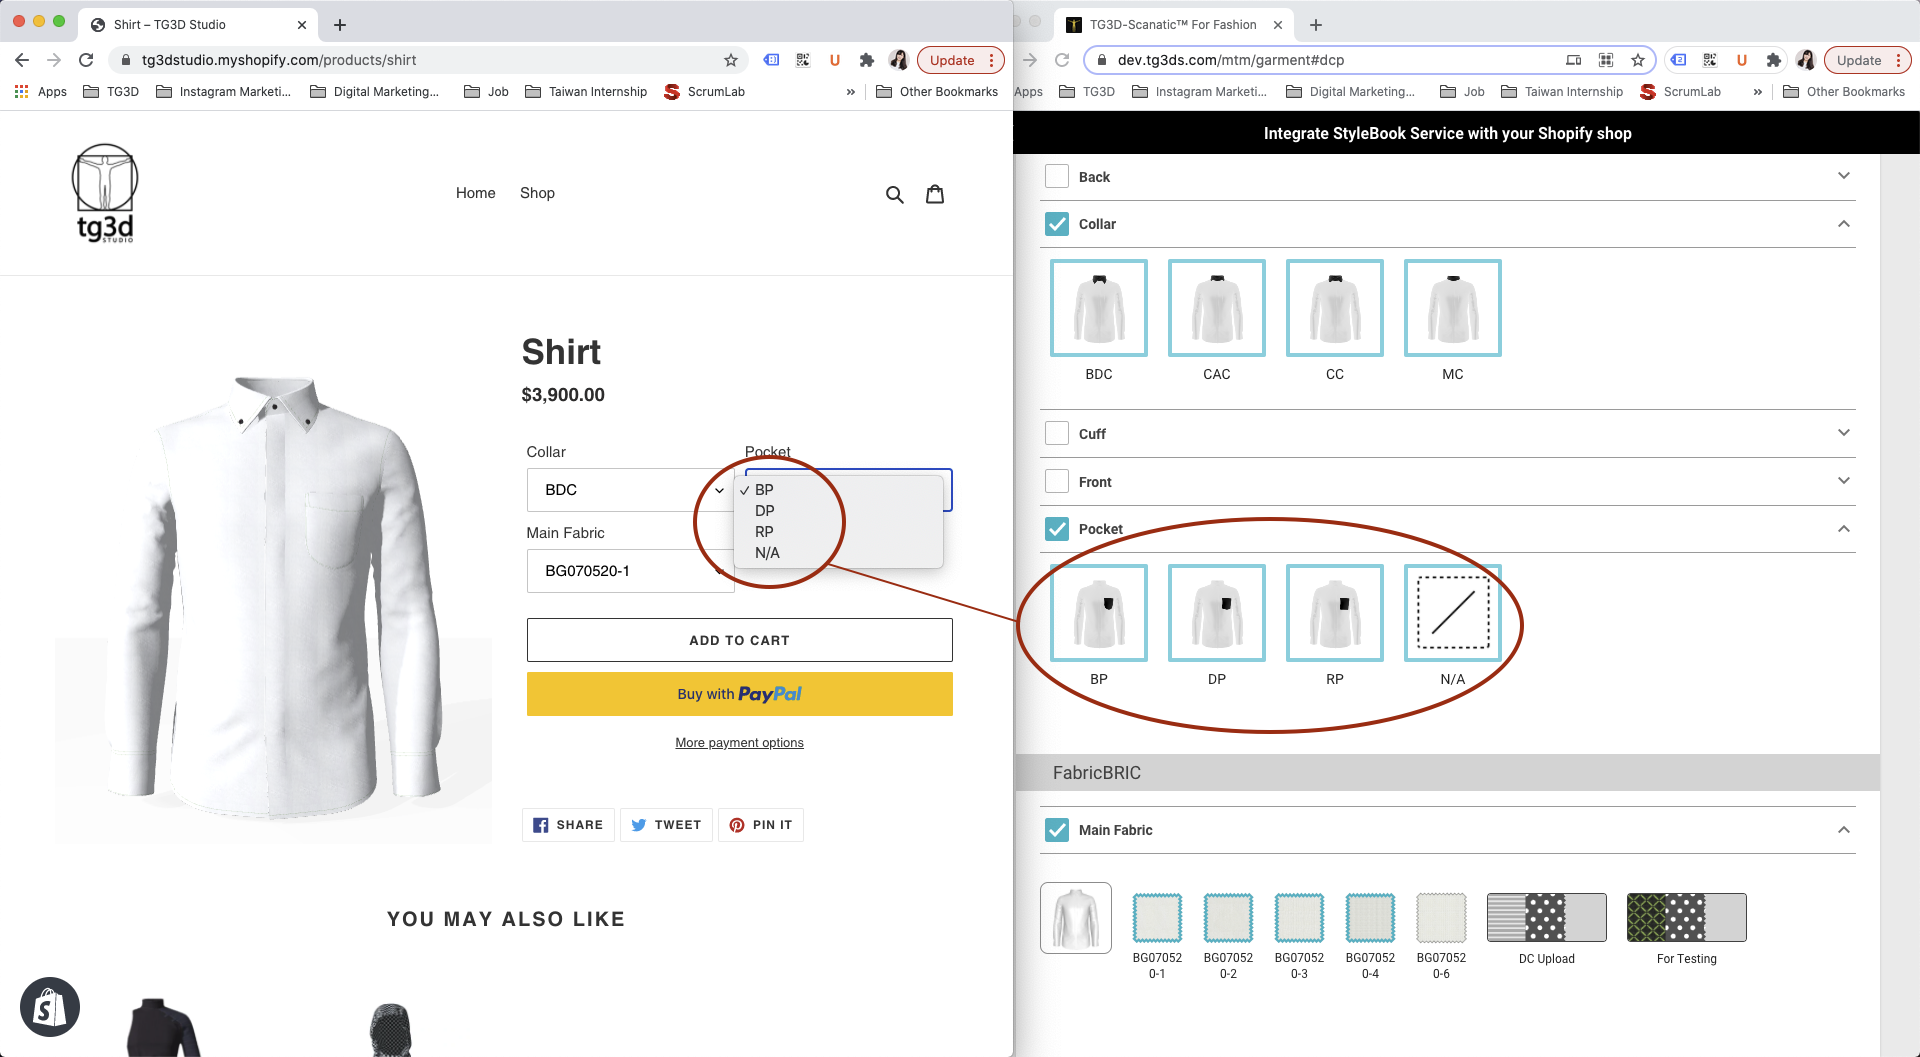
The customization options that you ticked will be displayed as the titles for the dropdown menus on your Shopify product page. Please see the example below.

The available choices you have selected under each customization options will be listed in the dropdown menu. Please see the examples below.
Step 4: Add custom codes to your “theme” (You will only need to do this for the first time)
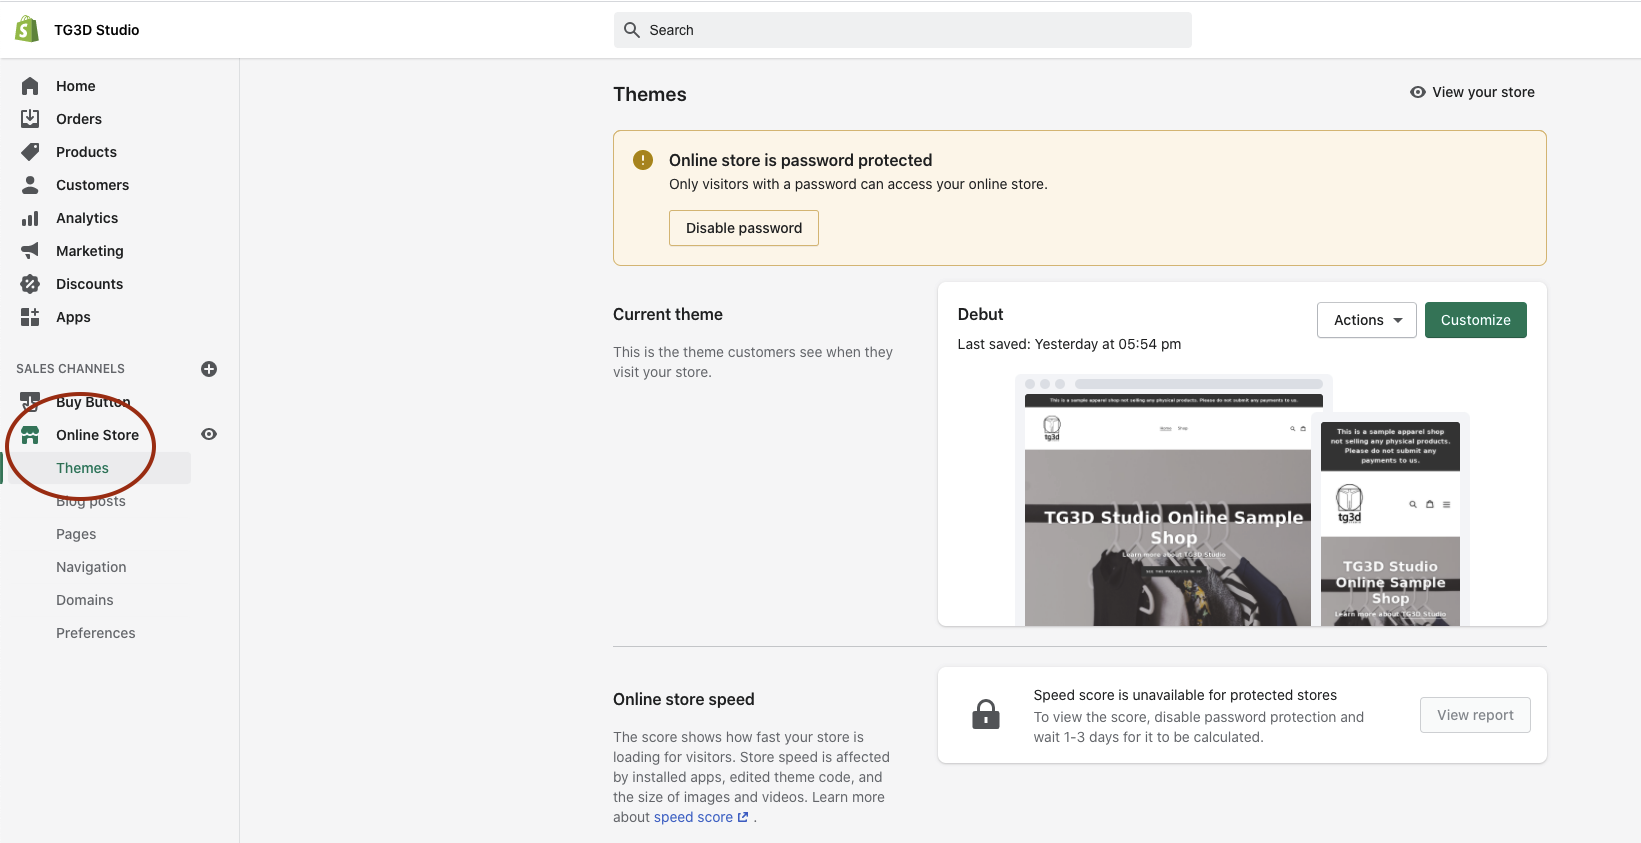
Go to your Shopify account page and click the “Online Store” tab on the left.
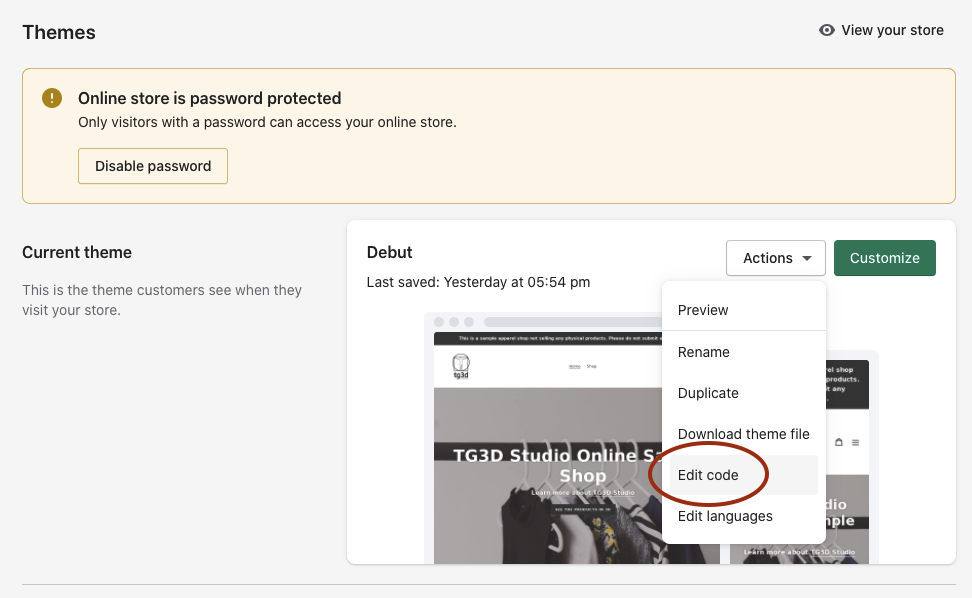
Click “Edit code” in the Actions dropdown.
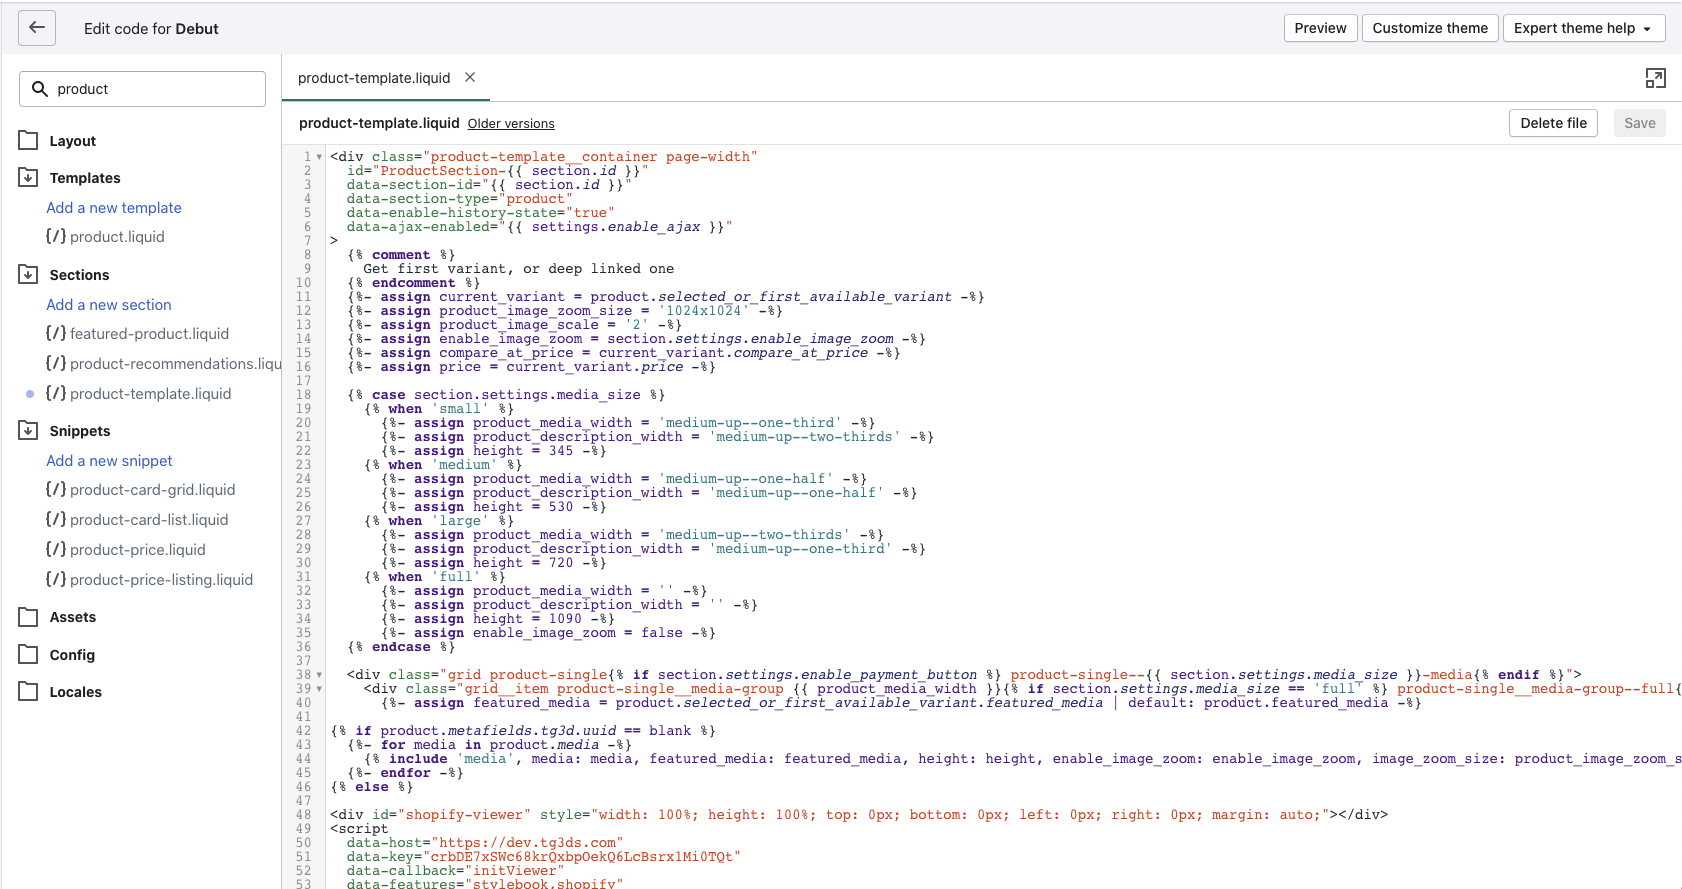
Type “product” in the search bar on the left and search for product-template.liquid on the lists.
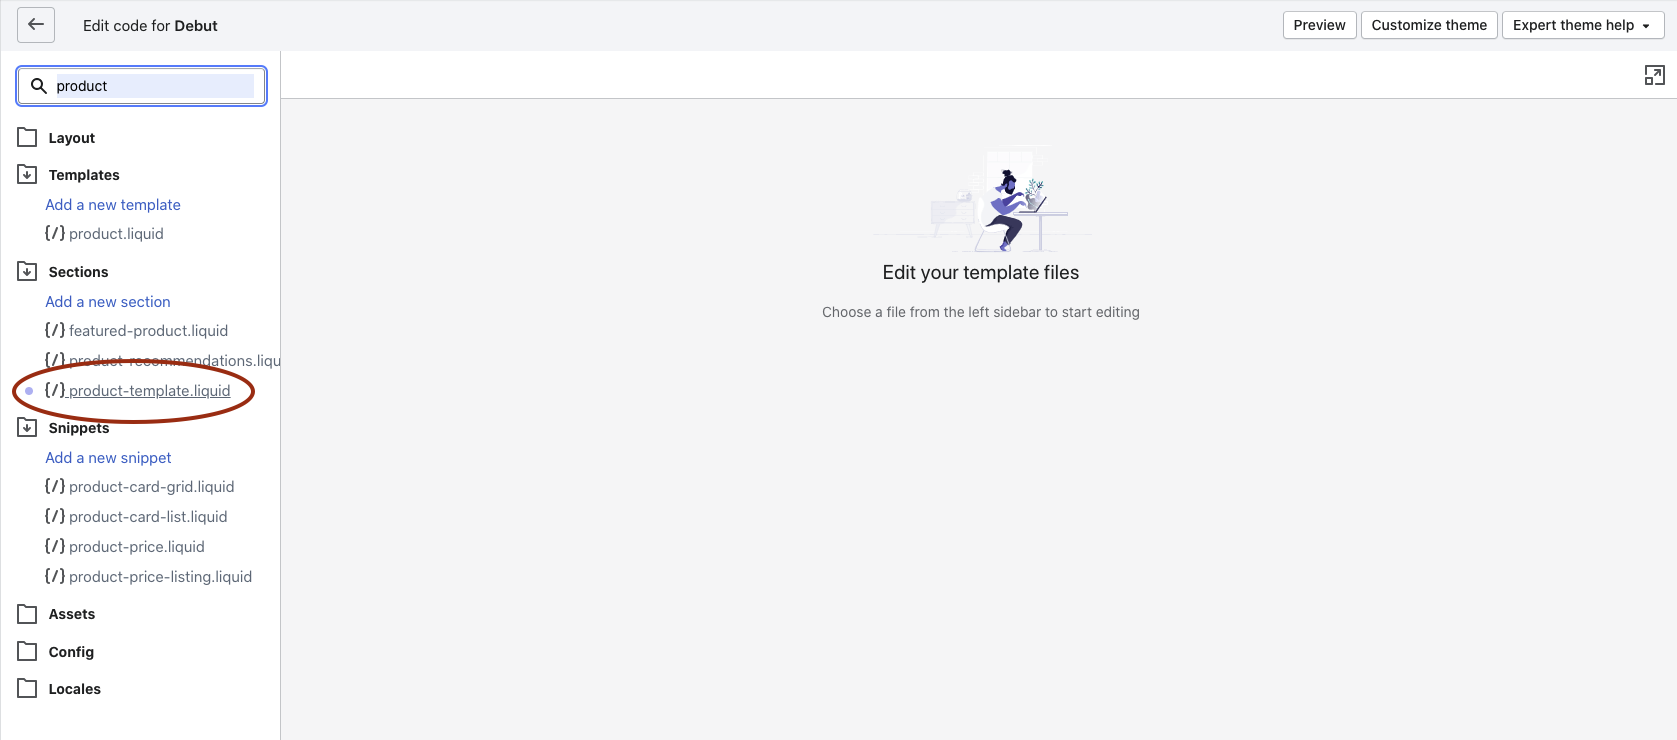
Click the “product-template.liquid” and the codes will be displayed on the right window.
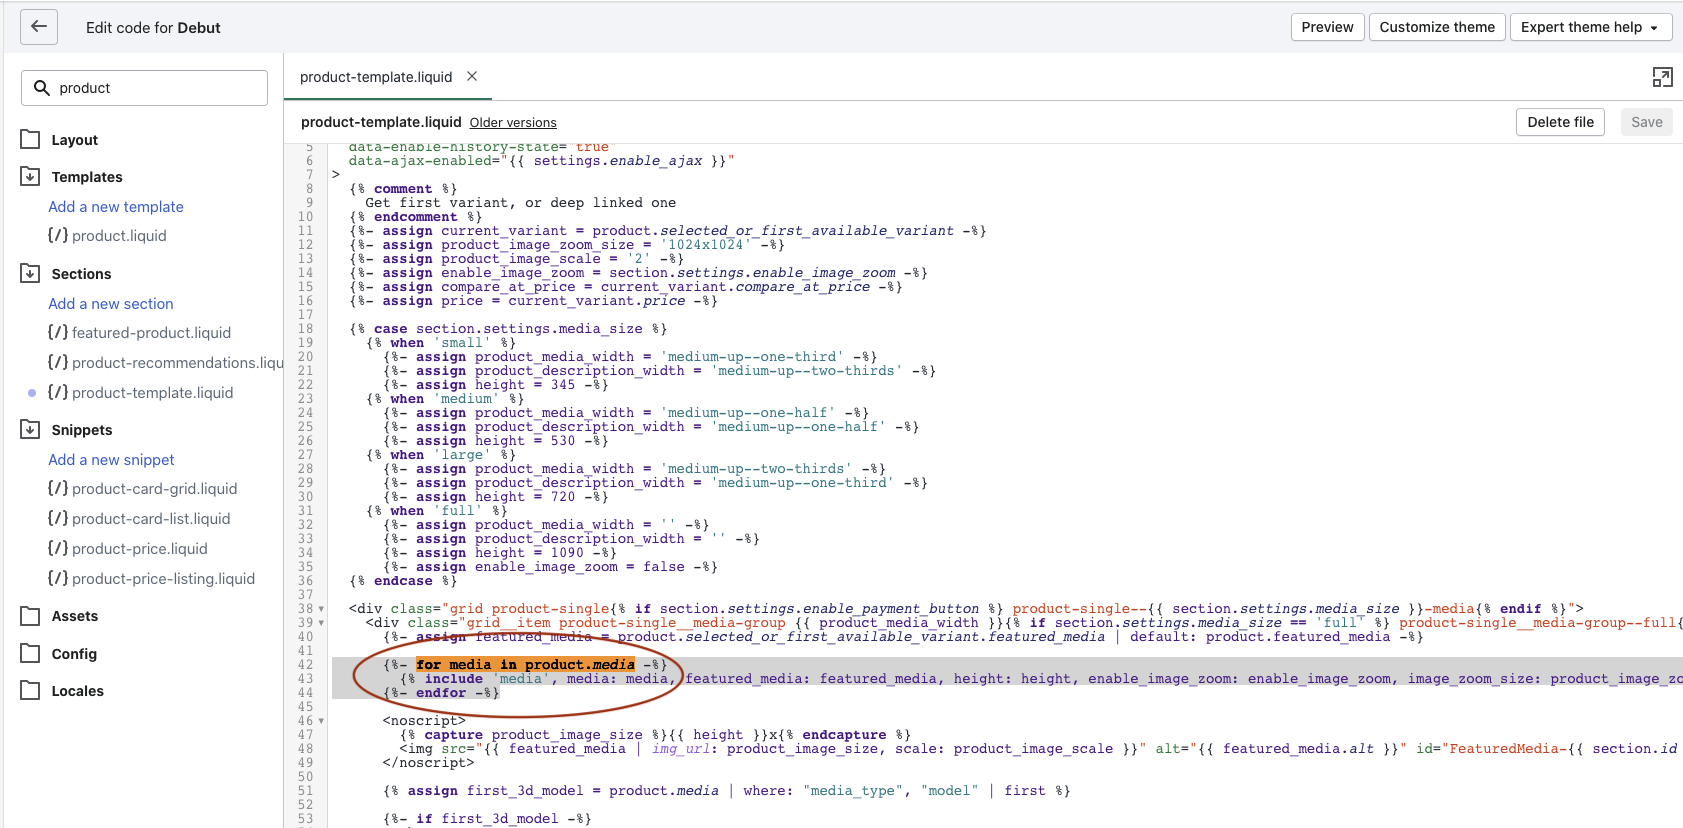
Press Ctrl (Command) + F, copy and paste this line: %- for media in product.media -% into the search bar.

You will see the following code snippet:
{%- for media in product.media -%}
{% include 'media', media: media, featured_media: featured_media, height: height, enable_image.....
{%- endfor -%}
Please replace this code snippet:
{%- for media in product.media -%}
    {% include 'media', media: media, featured_media: featured_media, height: height, enable_image_zoom: enable_image_zoom, image_zoom_size: product_image_zoom_size, image_scale: product_image_scale %}
{%- endfor -%}
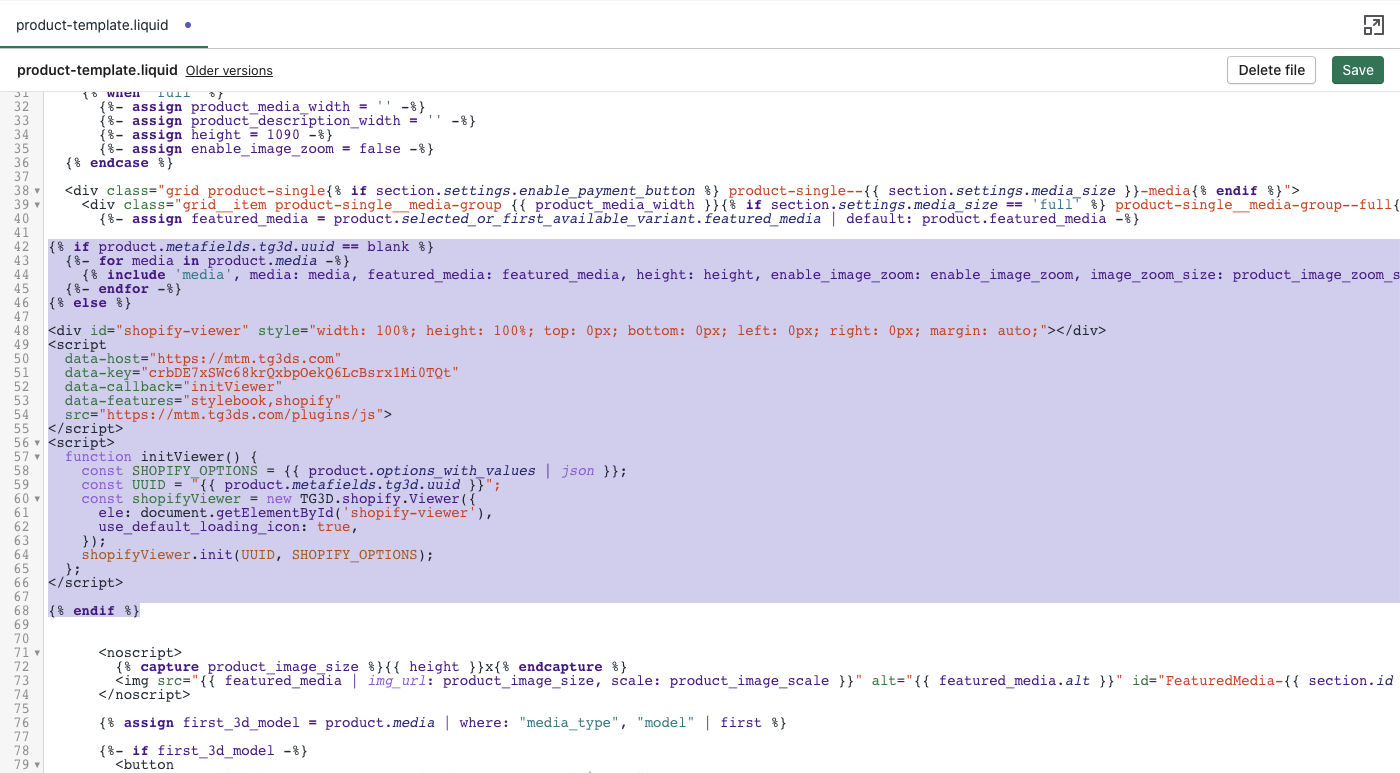
With the following code snippet:
{% if product.metafields.tg3d.uuid == blank %}
  {%- for media in product.media -%}
    {% include 'media', media: media, featured_media: featured_media, height: height, enable_image_zoom: enable_image_zoom, image_zoom_size: product_image_zoom_size, image_scale: product_image_scale %}
  {%- endfor -%}
{% else %}

<div id="shopify-viewer" style="width: 100%; height: 100%; top: 0px; bottom: 0px; left: 0px; right: 0px; margin: auto;"></div>
<script
  data-host="https://mtm.tg3ds.com"
  data-key="YOUR API-KEY"
  data-callback="initViewer"
  data-features="stylebook,shopify"
  src="https://mtm.tg3ds.com/plugins/js">
</script>

<script>
  function initViewer() {
    const SHOPIFY_OPTIONS = {{ product.options_with_values | json }};
    const SHOPIFY_VARIANTS = {{ product.variants | json }};
    const UUID = "{{ product.metafields.tg3d.uuid }}";
    const shopifyViewer = new TG3D.shopify.Viewer({
      ele: document.getElementById('shopify-viewer'),
 use_default_loading_icon: true,
    });
    shopifyViewer.init(UUID, SHOPIFY_OPTIONS, SHOPIFY_VARIANTS);
  };
</script>
{% endif %}
Press Ctrl (Command) + F, copy and paste this line: data-key="YOUR API-KEY” into the search bar.
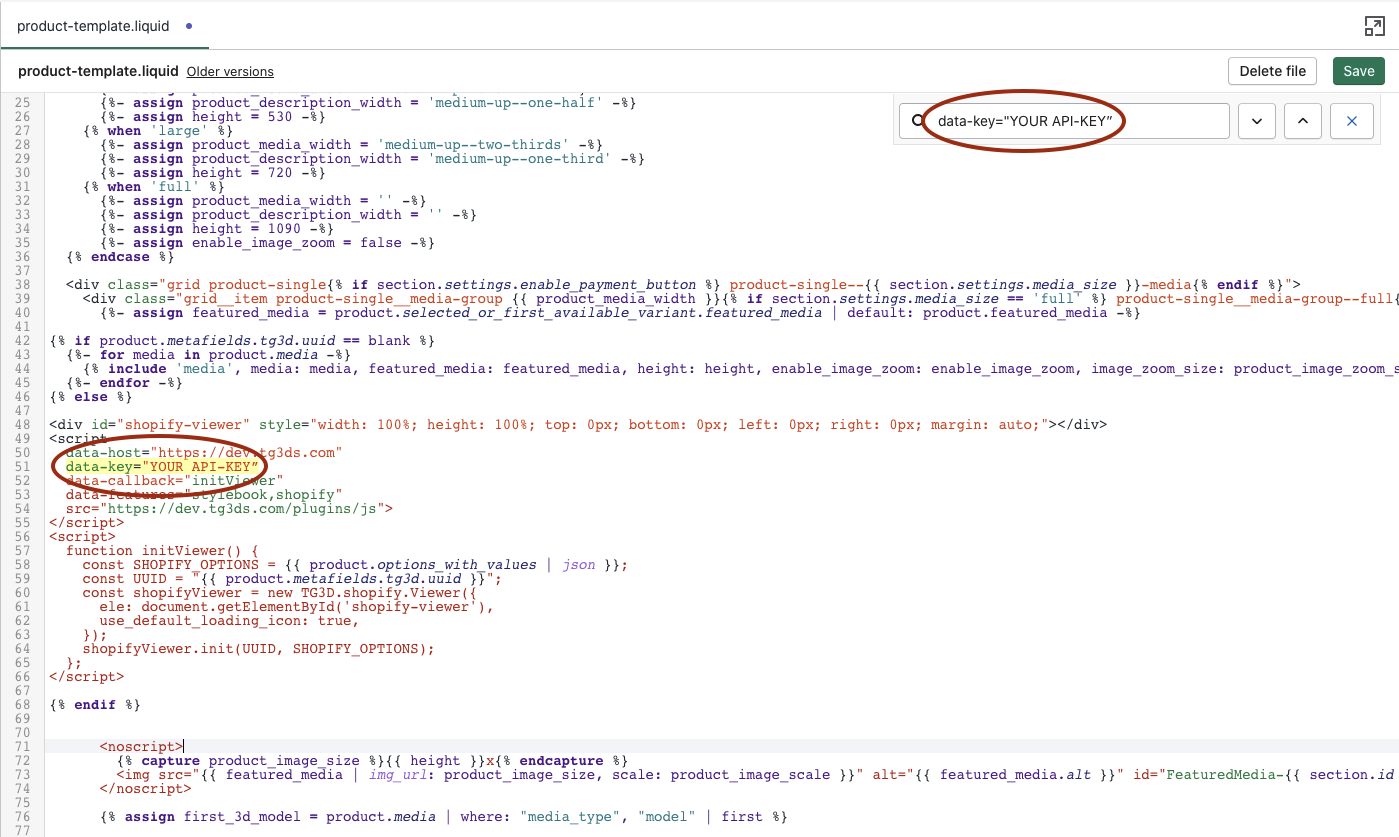
Leave this page open and go back to the Scanatic™ for Fashion (S4F) website to find your API keys in the “DEVELOPER CONSOLE” tab. Copy the API keys and paste the keys by replacing the word “YOUR API-KEY”. Remember to click “Save” after the changes.
Step 5: Add Products and Configure Variants
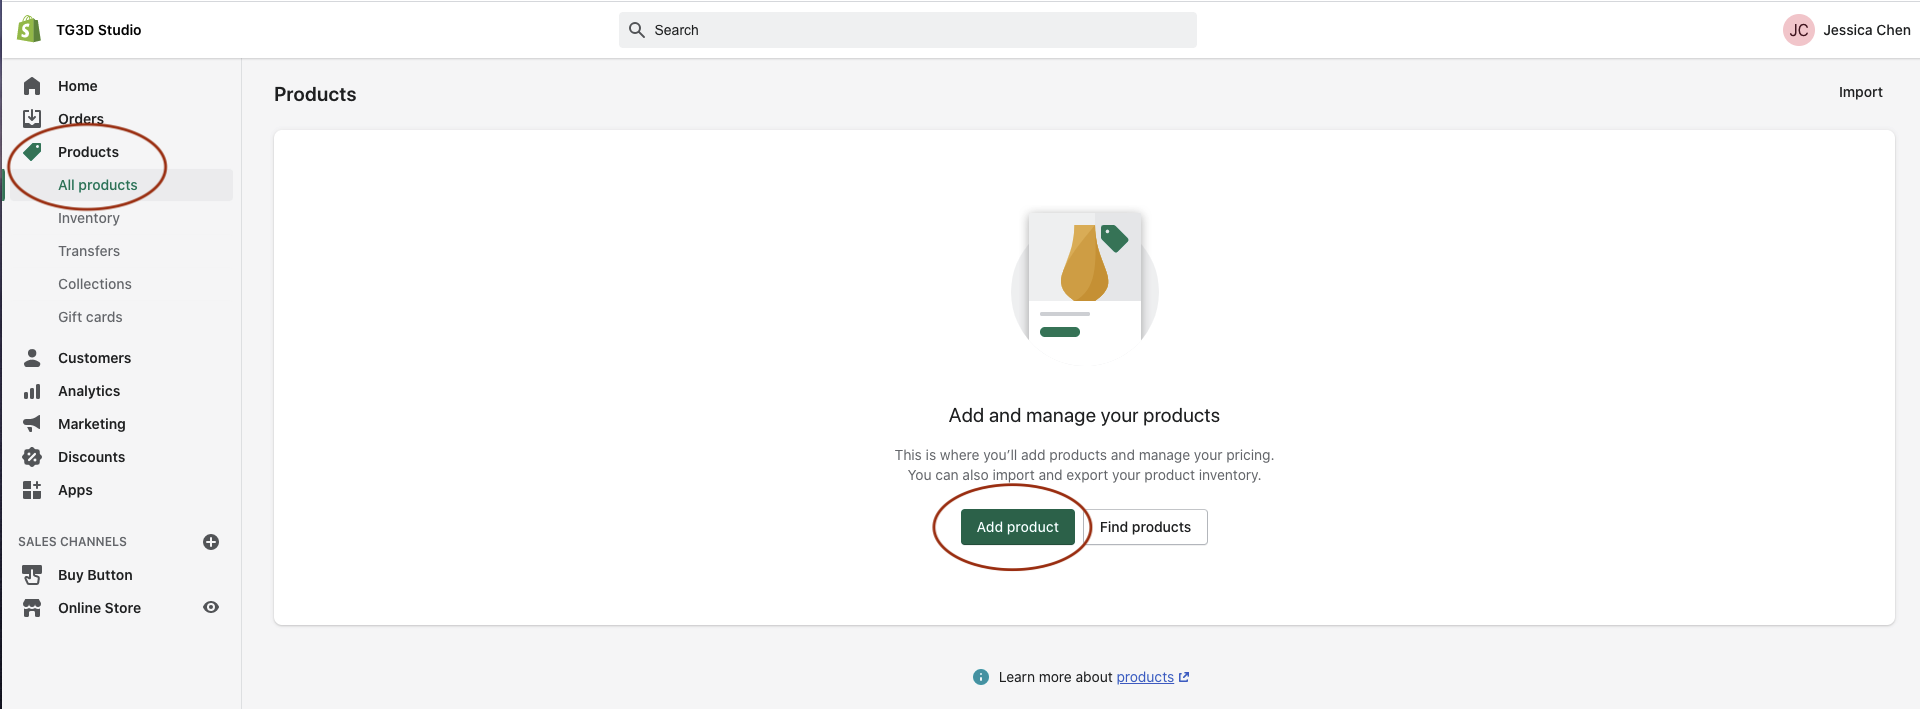
After saving the codes, click the “Product” tab on the right and click “Add product”.
Enter your product’s basic information.
Scroll down to the “Variants” section and check the box.

Step 6: Copy and paste the customization options and style combinations
Now, go back to the “Shopify Integration” page on Scanatic™ for Fashion (S4F) website, copy the customization options and style combinations one by one and paste them to the variants sections. Please leave the “Shopify Integration” page on Scanatic™ for Fashion (S4F) website open as you will need it for the rest of the setup.
After you add the variants, you could set the pricing and quantities to the products in bulk. Please remember to set the product to active after editing.
Step 7: Add the UUID to “Metafields guru”
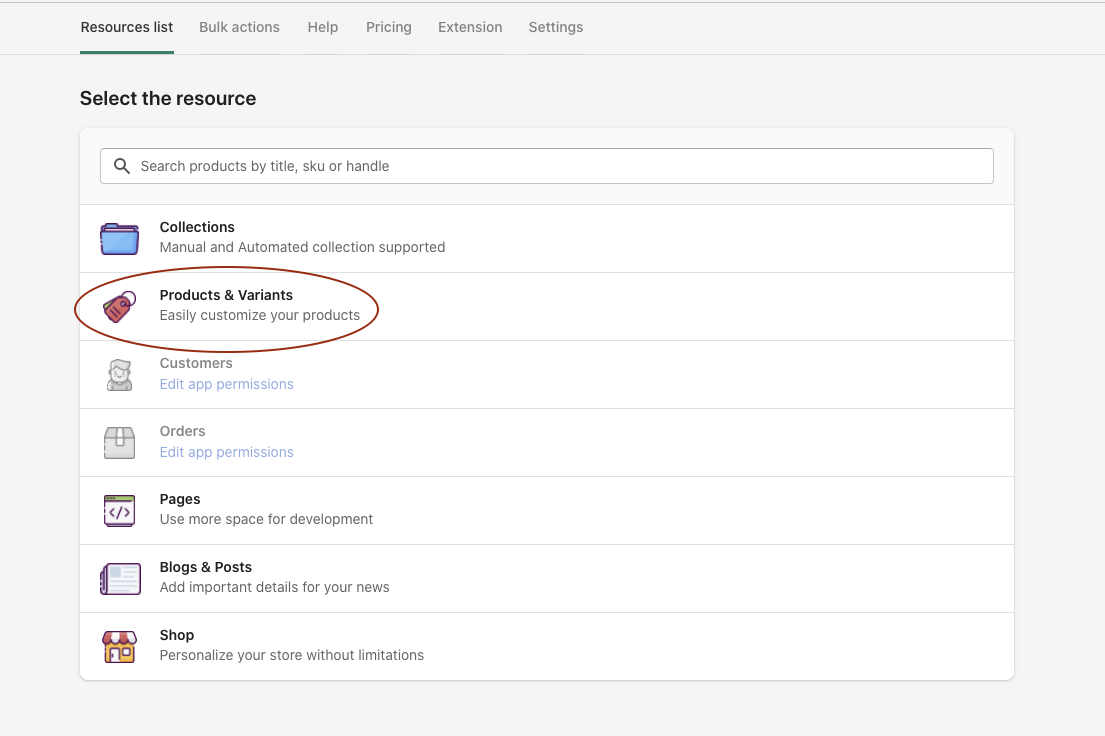
After adding the products and variants, please go to the App page on your Spotify admin page and click the Metafields Guru app.

Click the “Products & Variants” tab
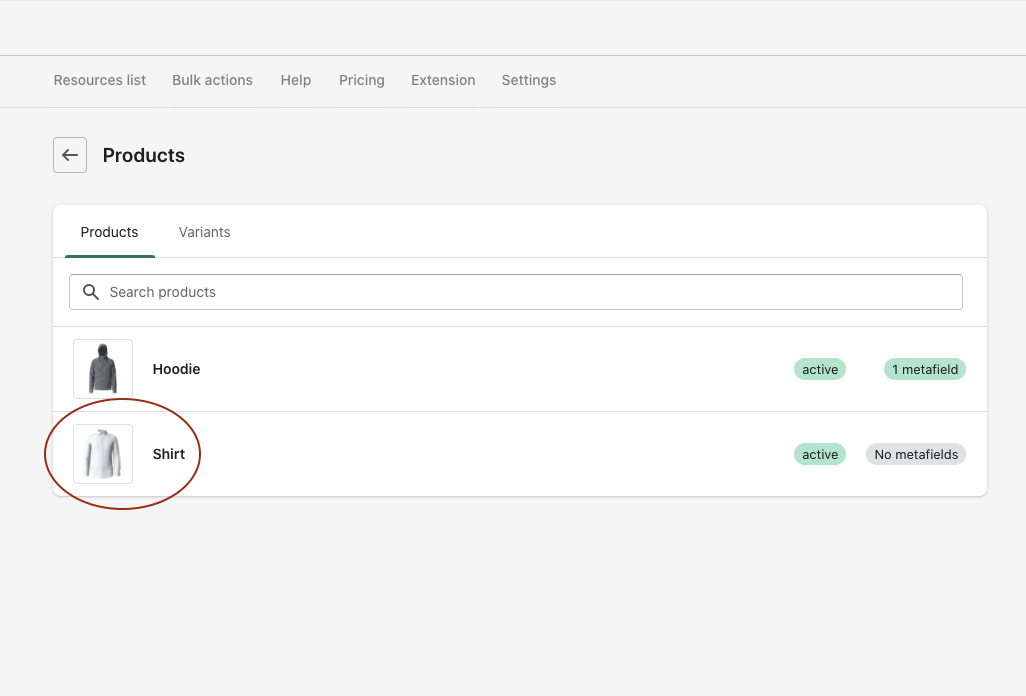
Click the product that you created in the previous steps
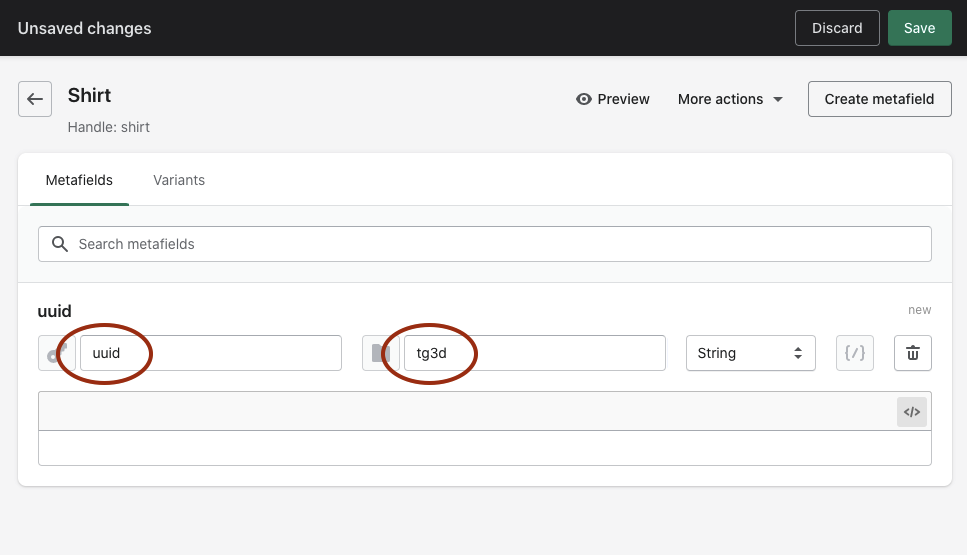
Click “Create metafield”

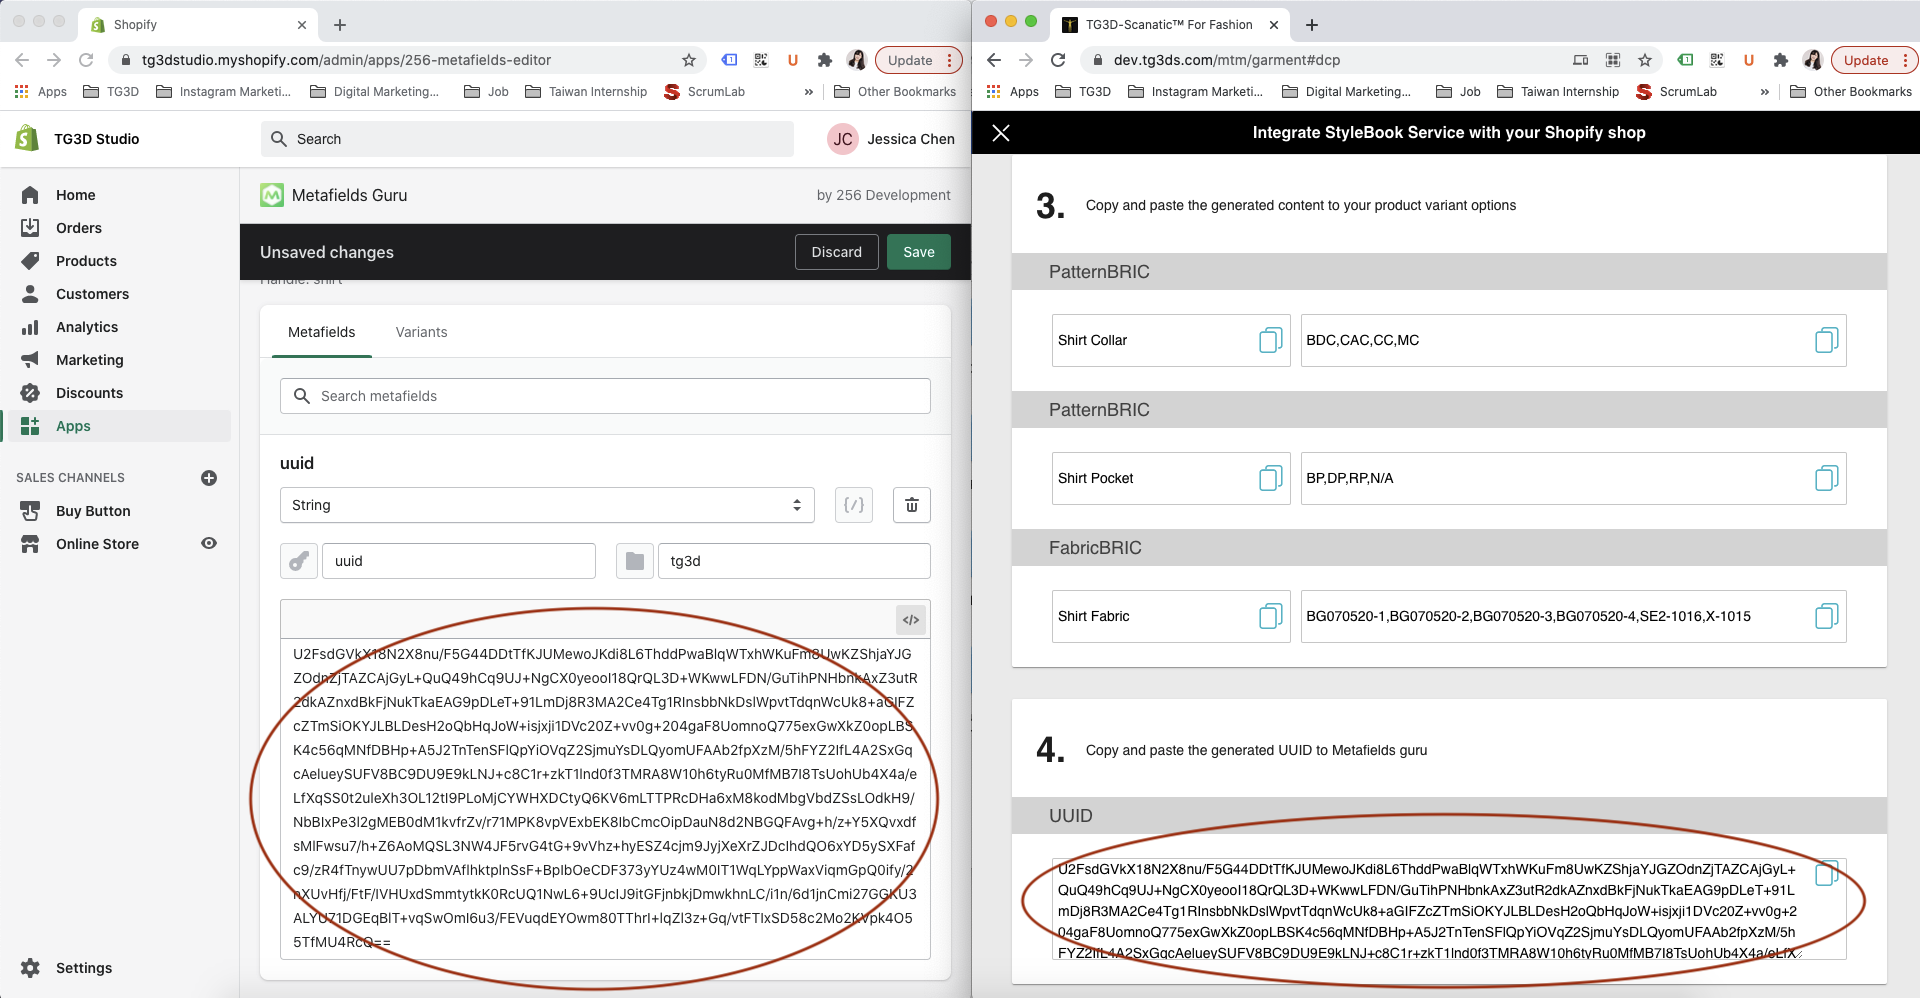
Type “uuid” at the key field and “tg3d” replacing the “global”
Go back to the “Shopify Integration” page on Scanatic™ for Fashion (S4F) website and copy the UUID code from 4. and paste the code in the </> box. Remember to click “Save” after the changes.
Comments
0 comments
Please sign in to leave a comment.